Easy Caramel Apples Recipe – Simple Fall Treat
Easy caramel apples are one of those classic fall treats that just feel special. The tartness of a crisp apple, coated in sweet, chewy caramel – it’s a perfect combination. Making them at home is surprisingly straightforward, and you can customize them with all sorts of fun toppings. This recipe uses readily available ingredients and a simple method that even beginners can master. The key to getting the caramel to stick well is to start with clean, dry apples. Wash your 7 small Granny Smith apples thoroughly under cool water. Granny Smiths are a great choice because their tartness cuts through the sweetness of the caramel beautifully, and they have a firm texture that holds up well. After washing, you need to dry them completely. Any moisture on the apple’s skin will prevent the caramel from adhering properly. You can pat them dry with a clean kitchen towel or paper towels. If you’re planning to put sticks in the apples, do that now. Firmly twist a craft stick or lollipop stick into the stem end of each apple, pushing it in about halfway. Make sure they are secure but don’t force them so hard that you crack the apple. Melting the Caramels This is where the magic happens. You’ll need a medium-sized, heavy-bottomed saucepan for this. Unwrap your 15 oz. of caramels. Unwrap them a few at a time and add them to the saucepan. Over medium-low heat, stir the caramels constantly as they begin to melt. Once they are mostly melted, stir in 3 tablespoons of heavy cream. Continue stirring until the caramel is completely smooth and glossy. This usually takes about 5-7 minutes. Adding the cream makes the caramel perfectly dippable and creates that classic chewy texture. Be patient with this step; don’t rush the melting process, or you might scorch the caramel. Keep the heat gentle and steady.
Ingredients:
- 7 small granny smith apples ((about 2 1/4 lbs))
- 15 oz. caramels, (such as Werther’s Chewy*)
- 3 Tbsp heavy cream
- Various toppings, (optional (see notes()).
Easy Caramel Apples
Caramel apples are one of those classic fall treats that just feel special. The tartness of a crisp apple, coated in sweet, chewy caramel – it’s a perfect combination. Making them at home is surprisingly straightforward, and you can customize them with all sorts of fun toppings. This recipe uses readily available ingredients and a simple method that even beginners can master.
Preparing the Apples
The key to getting the caramel to stick well is to start with clean, dry apples. Wash your 7 small Granny Smith apples thoroughly under cool water. Granny Smiths are a great choice because their tartness cuts through the sweetness of the caramel beautifully, and they have a firm texture that holds up well. After washing, you need to dry them completely. Any moisture on the apple’s skin will prevent the caramel from adhering properly. You can pat them dry with a clean kitchen towel or paper towels. If you’re planning to put sticks in the apples, do that now. Firmly twist a craft stick or lollipop stick into the stem end of each apple, pushing it in about halfway. Make sure they are secure but don’t force them so hard that you crack the apple.
Melting the Caramels
This is where the magic happens. You’ll need a medium-sized, heavy-bottomed saucepan for this. Unwrap your 15 oz. of caramels. Unwrap them all first to save yourself a bit of hassle once things start melting. Place the unwrapped caramels into the saucepan. Add the 3 tablespoons of heavy cream to the caramels. The heavy cream is essential for creating a smooth, dippable caramel consistency. It adds richness and helps the caramel melt evenly without becoming too stiff. Heat the saucepan over medium-low heat. It’s important to use low to medium-low heat to prevent the caramel from scorching or burning. Stir the caramels and cream frequently with a heatproof spatula or wooden spoon. You’ll notice them starting to soften and then melt. Keep stirring until the caramel is completely smooth and has a glossy appearance. This usually takes about 5-10 minutes. Don’t rush this step; patience ensures a perfectly melted caramel sauce.
Coating the Apples
Once your caramel is smooth and luscious, it’s time to dip the apples. You’ll want to work relatively quickly because the caramel will start to thicken as it cools. Holding an apple by its stick, tilt the saucepan and dip the apple into the melted caramel. Rotate the apple to coat it evenly. You can dip it as deep as you like, but usually coating about two-thirds of the apple is ideal. If you want a thicker coating, you can dip the apple twice, letting it drip for a moment between dips. For those who prefer a thinner coating, simply swirl the apple gently in the caramel until it’s coated to your liking. As you lift the apple from the caramel, let any excess drip back into the saucepan for a moment. This helps create a nice, smooth finish. Be careful not to touch the hot caramel.
Adding the Toppings
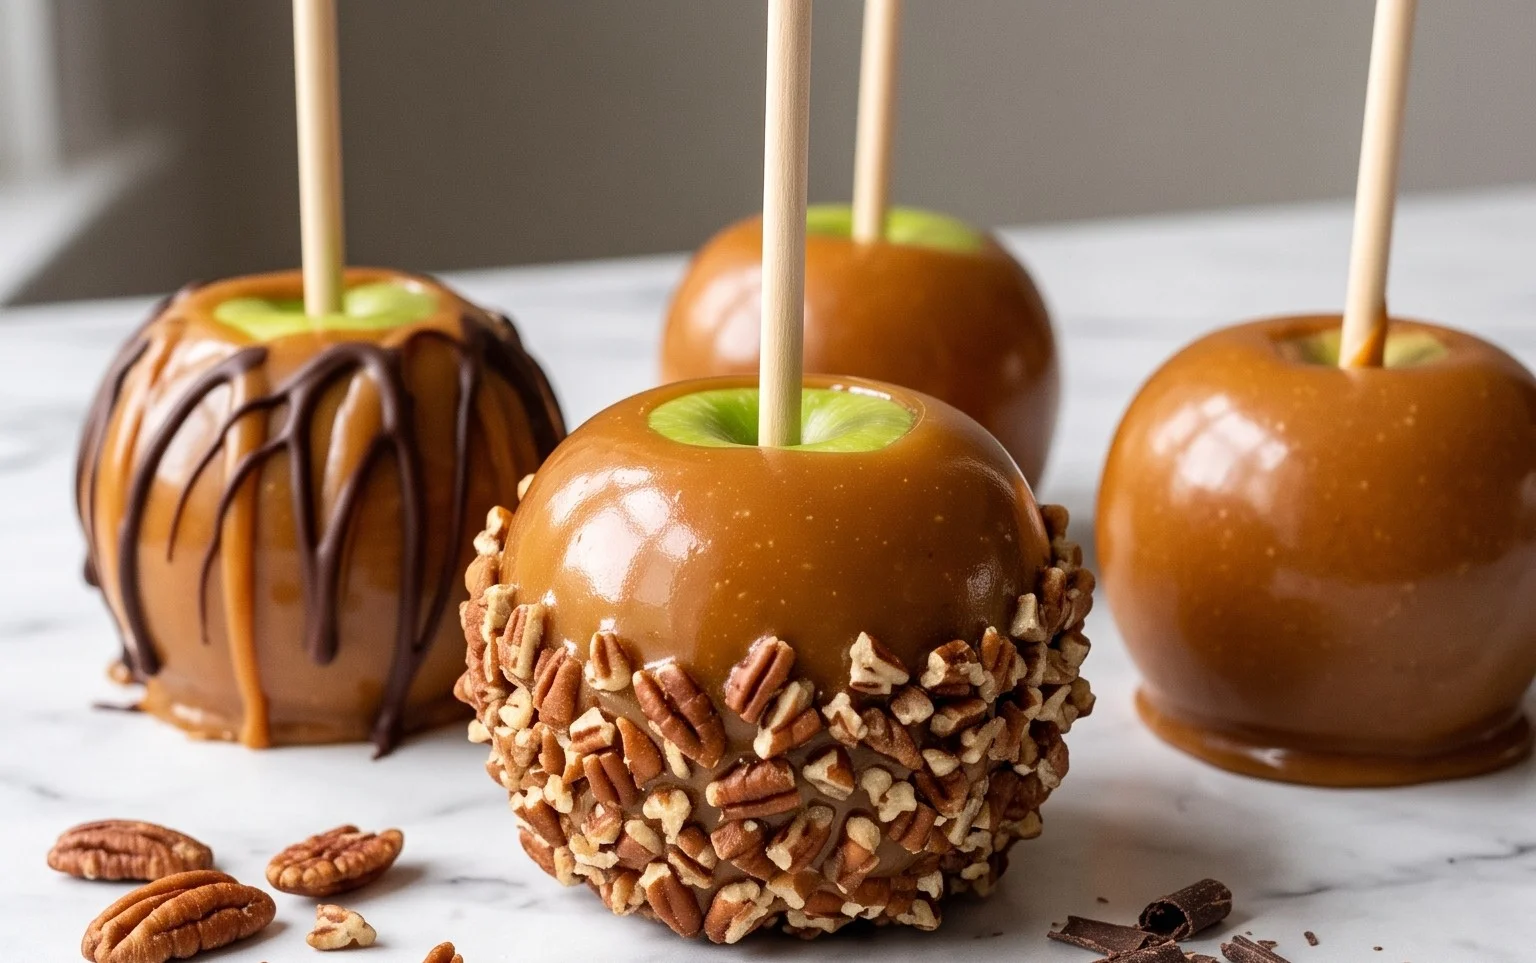
After dipping each apple, you’ll want to place it on a prepared surface to set. Line a baking sheet with parchment paper or wax paper. This prevents the caramel apples from sticking to the pan. Immediately after dipping an apple and letting the excess caramel drip off, you can add your toppings. This is the fun part! You can sprinkle on chopped nuts (peanuts, pecans, walnuts), mini chocolate chips, sprinkles, crushed cookies, or even a drizzle of melted chocolate. If you’re using toppings that are heavier, like nuts, gently press them onto the caramel while it’s still warm and soft so they adhere well. If you plan to drizzle with melted chocolate later, wait until the caramel has set a bit. Some people like to add a touch of sea salt on top for a sweet and salty contrast, which is absolutely delicious.
Setting and Serving
Once all your apples are dipped and topped, you need to let them set. Place the baking sheet with the caramel apples into the refrigerator for at least 30 minutes, or until the caramel is firm to the touch. You can also let them set at room temperature if your kitchen isn’t too warm, but the fridge speeds up the process and ensures a firm coating. Once set, your easy caramel apples are ready to be enjoyed! They are best eaten within a few days. Store any leftovers loosely covered in the refrigerator to keep the caramel from getting too hard.
Notes and Tips for Success
Toppings (): The possibilities are endless! Besides nuts and sprinkles, consider chopped pretzels for a salty crunch, shredded coconut, mini M&Ms, or even a swirl of different melted chocolates (white, milk, dark). A drizzle of contrasting colored melted chocolate over the set caramel adds a professional touch. You can melt chocolate chips in a microwave-safe bowl in 30-second intervals, stirring between each, until smooth. Then, using a fork or a piping bag with a small tip, drizzle it over the apples.
Caramel Consistency: If your caramel becomes too thick while dipping, you can gently reheat it over low heat with a tiny splash more cream. If it’s too thin, continue to let it sit off the heat for a minute or two longer to thicken slightly. It should be pourable but not watery.
Apple Size: While this recipe calls for small apples, you can use medium-sized apples. You’ll likely need more caramel and may have fewer apples per batch. Adjust the quantity of caramels if you’re using larger apples. Make sure the sticks are well-secured, especially with heavier apples.
No Sticks? If you don’t have sticks or prefer not to use them, you can spoon the caramel over the apples while they are resting on parchment paper. This method can be a bit messier but still yields delicious results. You’ll essentially be creating caramel apple halves or sections.
Storage: Wrapped individually in plastic wrap and stored in an airtight container in the refrigerator, caramel apples can last for about 3-5 days. The caramel may become quite firm in the fridge, so letting them sit at room temperature for about 10-15 minutes before eating can improve their texture.
Conclusion:
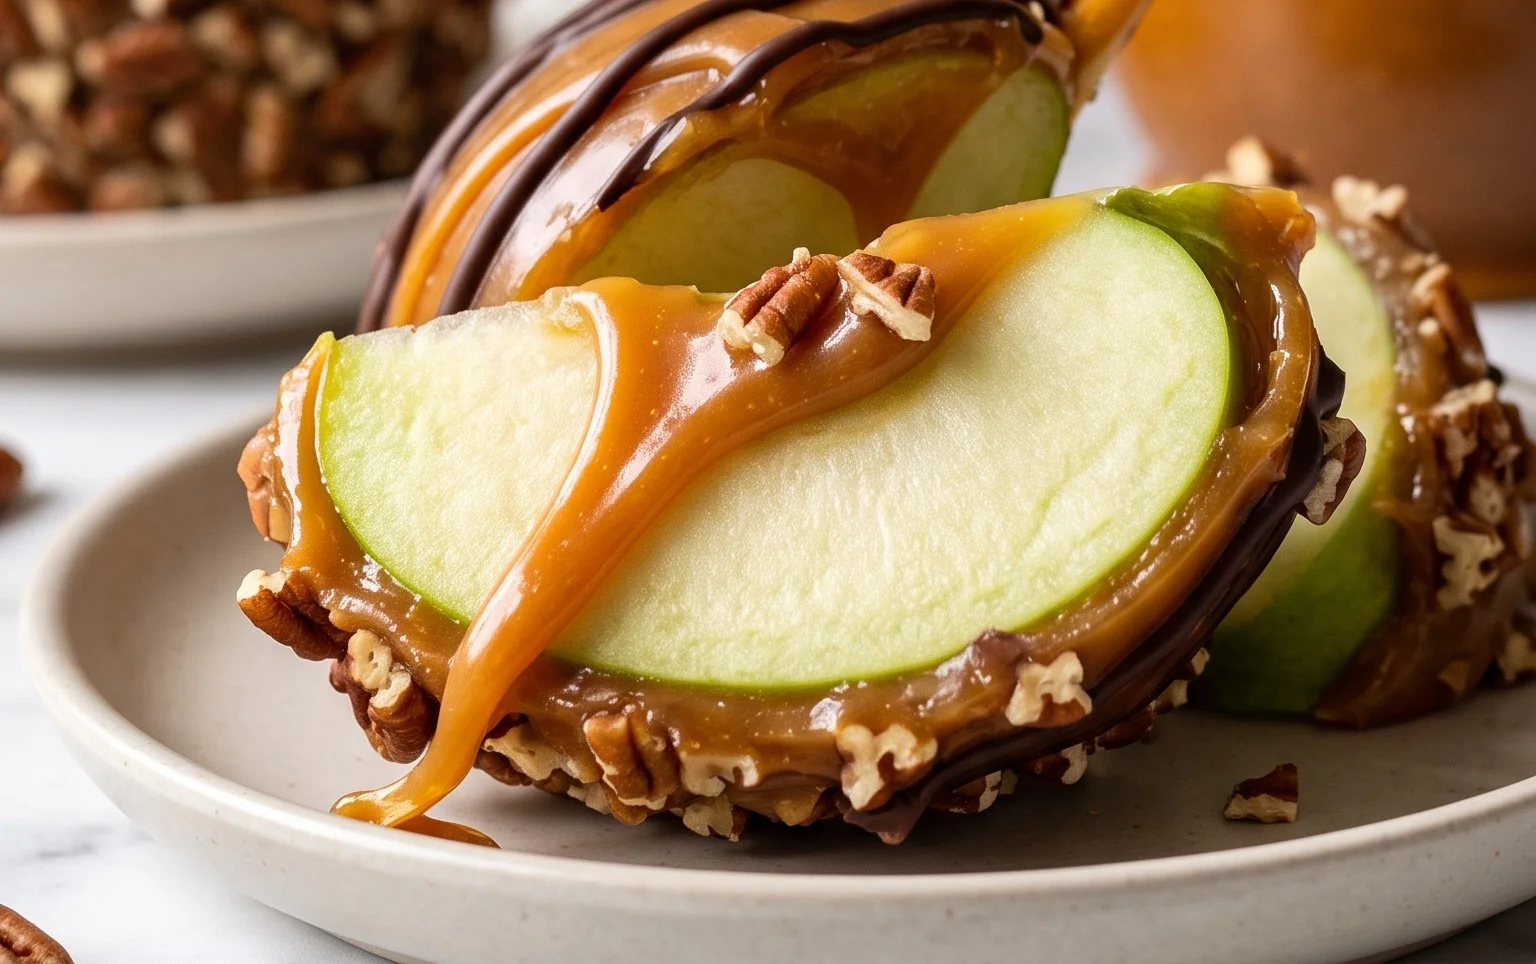
Making your own easy caramel apples is a fun and rewarding activity, perfect for a crisp autumn afternoon or a festive gathering. The simple process results in a delicious treat that rivals any store-bought version. Plus, you get to control the quality of ingredients and go wild with toppings! Serve these delightful caramel apples with a drizzle of extra caramel, some melted chocolate, or a sprinkle of sea salt for a gourmet touch. They are fantastic on their own or as part of a dessert spread. For variations, try adding a pinch of cinnamon to the caramel as it melts for a spiced flavor, or dip them halfway in melted chocolate before adding caramel. You can also experiment with different apple varieties, though Granny Smiths are highly recommended for their balance of tartness and firmness. Don’t be afraid to get creative with toppings like chopped nuts, sprinkles, or crushed cookies. These homemade caramel apples are sure to be a hit with everyone.
Frequently Asked Questions:
Why aren’t my caramels sticking to the apples?
This usually happens if the apples aren’t completely dry. Any moisture on the apple’s skin will prevent the caramel from adhering properly. Make sure to dry them thoroughly after washing. Also, ensure your caramel is hot and smooth enough for dipping.
Can I make caramel apples without heavy cream?
Yes, you can substitute the heavy cream with whole milk or even half-and-half, though the texture might be slightly different, potentially a bit thinner or less rich. Water can also be used in a pinch, but it won’t yield the same smooth, creamy result.
How do I store leftover caramel apples?
Caramel apples are best enjoyed fresh. However, you can store them loosely wrapped in parchment paper and then in an airtight container in the refrigerator for up to 2-3 days. The caramel may harden slightly when chilled. Let them come to room temperature for about 30 minutes before serving.
Easy Caramel Apples
A simple and delicious recipe for making classic caramel apples at home, perfect for a fun fall treat or party.
Ingredients
-
7 small granny smith apples ((about 2 1/4 lbs))
-
15 oz. caramels, (such as Werther’s Chewy*)
-
3 Tbsp heavy cream
-
1/4 cup chopped peanuts, (optional topping)
-
1/4 cup sprinkles, (optional topping)
-
1/4 cup mini chocolate chips, (optional topping)
Instructions
-
Step 1
Wash and thoroughly dry the apples. Insert a popsicle stick or sturdy skewer into the stem end of each apple, pushing it in about halfway. -
Step 2
In a microwave-safe bowl, combine the caramels and heavy cream. Microwave on high for 1 minute, stir, then microwave in 30-second intervals, stirring after each, until smooth and fully melted. Be careful not to overheat. -
Step 3
Dip each apple into the caramel mixture, tilting the bowl to coat the apple evenly. Allow excess caramel to drip back into the bowl. -
Step 4
Immediately after dipping, if using, roll the caramel-coated apple in your desired toppings on a plate or parchment-lined baking sheet. -
Step 5
Place the caramel apples on parchment paper or a silicone baking mat to set. Allow them to cool and harden completely, which may take about 15-20 minutes at room temperature, or speed up in the refrigerator.
Important Information
Nutrition Facts (Per Serving)
It is important to consider this information as approximate and not to use it as definitive health advice.
Allergy Information
Please check ingredients for potential allergens and consult a health professional if in doubt.