Canning Pizza Sauce Preserve Summer Taste Homemade
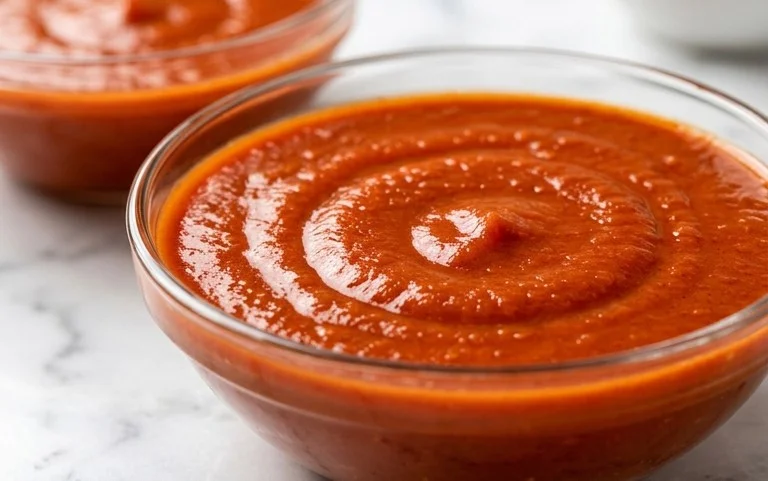
Pizza sauce canning is an absolute game-changer for any pizza lover who dreams of homemade perfection, anytime. Imagine the aroma of fresh, vibrant tomatoes, simmering with fragrant herbs, transforming into a rich, flavourful sauce ready to be slathered on your next pizza creation. There’s a special kind of magic in having a pantry stocked with your own homemade pizza sauce, a tangible reminder of summer’s bounty preserved for those cozy nights in. We all love pizza because it’s a canvas for our culinary creativity, and the sauce is undeniably the heart of it all. This particular pizza sauce canning recipe is special because it captures that authentic, slightly sweet, slightly tangy taste that perfectly complements any topping, from classic beef pepperoni to a sophisticated white pizza. It’s so much more than just a condiment; it’s the soul of your pizza, waiting to be unlocked.”
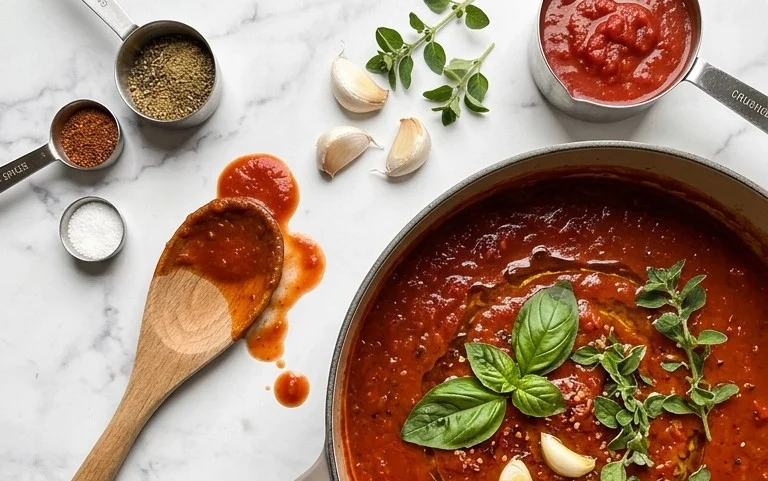
Preserve the Taste of Summer: My Go-To Pizza Sauce Canning Recipe
There’s nothing quite like homemade pizza, and the secret to a truly fantastic pizza lies in its sauce. Forget the store-bought stuff; canning your own pizza sauce allows you to capture the vibrant flavors of peak-season tomatoes and customize it to your liking. This recipe is my tried-and-true method for creating a rich, flavorful, and shelf-stable pizza sauce that will have you dreaming of Italian nights all year round. It’s a rewarding process, and the satisfaction of opening a jar of your own delicious sauce is unparalleled.
Ingredients:
- 20 pounds Roma tomatoes
- 1 cup chopped yellow onion
- 8 cloves garlic, minced
- 1/4 cup finely minced fresh basil
- 2 teaspoons salt (optional, adjust to your preference)
- Citric acid (or bottled lemon juice) – approximately 1 teaspoon per pint jar, or 2 teaspoons per quart jar. This is crucial for safe canning.
Preparing Your Tomatoes
The foundation of any great pizza sauce is, of course, the tomatoes. Roma tomatoes, also known as plum tomatoes, are ideal for this recipe due to their lower water content and fewer seeds, which results in a thicker, more concentrated sauce. We’ll start by preparing these beautiful red gems.
First, you’ll want to wash your 20 pounds of Roma tomatoes thoroughly. Next, I like to give them a quick blanch. This might sound like an extra step, but it makes peeling them incredibly easy. To blanch, score an “X” on the bottom of each tomato. Then, carefully lower a few tomatoes at a time into boiling water for about 30 to 60 seconds, until the skins begin to split. Immediately transfer them to an ice bath to stop the cooking process. Once cooled, the skins should slip off with minimal effort. Don’t worry if a few bits remain; you can always remove them as you chop.
After peeling, I like to quarter the tomatoes. You can then choose to remove most of the seeds if you prefer a smoother sauce, or leave some in for added texture and flavor. The choice is yours! For this recipe, I usually remove about half the seeds. Once quartered and seeded (if desired), roughly chop the tomatoes. You’ll end up with a large batch, which is exactly what we want for canning.
Building the Flavor Base
Now, let’s add some aromatics to build a robust flavor profile. In a large, heavy-bottomed pot or Dutch oven, add your chopped tomatoes. Toss in the 1 cup of chopped yellow onion and the 8 minced cloves of garlic. The onion will soften and sweeten as it cooks, adding a lovely depth to the sauce, and the garlic provides that quintessential pizza sauce punch. Stir everything together.
Simmering and Thickening
This is where the magic happens! We’ll bring everything to a simmer and let the flavors meld and the sauce thicken. Place the pot over medium-high heat and bring the mixture to a boil. Once boiling, reduce the heat to low, cover, and let it simmer for about 1 to 1.5 hours, stirring occasionally. The goal here is to cook down the tomatoes, allowing excess water to evaporate and concentrating the flavors. As it simmers, you’ll notice the sauce begin to thicken.
After about an hour of simmering, you can stir in your 1/4 cup of finely minced fresh basil. Basil adds a bright, fresh, herbaceous note that is absolutely essential for a classic pizza sauce. If you’re using dried basil, start with about 1 tablespoon and adjust to your taste, but fresh is always best for this recipe. Also, stir in the 2 teaspoons of salt, if you are using it. Remember, you can always add more salt later when you’re using the sauce, so it’s best to start conservatively.
Continue to simmer, uncovered, for another 30 minutes to an hour, or until the sauce reaches your desired consistency. I prefer a slightly chunky sauce, so I don’t cook it down to a completely smooth puree. Stir frequently during this final stage to prevent sticking and burning, which can easily happen as the sauce thickens.
Achieving the Perfect Texture
Now, let’s talk about texture. If you prefer a smoother pizza sauce, this is the time to blend it. You can use an immersion blender directly in the pot, or carefully transfer the sauce in batches to a regular blender. Be very cautious when blending hot liquids! If you prefer a chunkier sauce, you can simply skip this step or pulse the blender a few times for a more rustic texture.
Preparing for Canning
Before we can put our delicious sauce into jars, we need to prepare for the canning process. Make sure your canning jars, lids, and bands are clean and sterilized. You can do this by washing them in hot, soapy water and rinsing well, or by running them through a dishwasher cycle. Keep the jars hot until you’re ready to fill them; this helps prevent breakage when they come into contact with the hot sauce.
For safe water bath canning, it is absolutely critical to add acid to your low-acid foods like tomatoes. This helps to ensure that your sauce is safe from harmful bacteria. For every pint jar, add 1 teaspoon of citric acid, or for every quart jar, add 2 teaspoons. If you don’t have citric acid, you can use bottled lemon juice, adding 1 tablespoon per pint or 2 tablespoons per quart. You can add this directly to the bottom of each clean, hot jar before filling.
Filling and Processing the Jars
Carefully ladle the hot pizza sauce into your prepared jars, leaving about 1/2 inch of headspace at the top. Headspace is the empty space between the top of the food and the rim of the jar, and it’s crucial for creating a proper seal. Use a non-metallic utensil (like a plastic spatula or chopstick) to remove any air bubbles trapped in the sauce by running it around the inside of the jar. Add more sauce if needed to maintain the correct headspace.
Wipe the rims of the jars clean with a damp cloth; any food residue on the rim can prevent a proper seal. Place the flat lids on top of the jars and screw on the bands fingertip-tight. Don’t overtighten them; this can prevent air from escaping during processing.
Now, place your filled jars into a boiling water bath canner that is already filled with water and brought to a simmer. Ensure the water covers the jars by at least 1 to 2 inches. Once the water returns to a rolling boil, begin timing your processing. Process pint jars for 35 minutes and quart jars for 45 minutes, adjusting for altitude if you live more than 1,000 feet above sea level.
Cooling and Storing
After the processing time is complete, carefully remove the jars from the canner using jar lifters and place them on a towel-lined counter or a cooling rack. Leave them undisturbed for 12 to 24 hours. You’ll likely hear the satisfying “ping” as the lids seal. After the cooling period, check the seals by pressing down on the center of each lid. If the lid doesn’t flex up and down, it has sealed properly. Remove the bands from the sealed jars, wipe them clean, and store your beautiful homemade pizza sauce in a cool, dark place. Properly canned pizza sauce will last for at least a year. Enjoy the incredible taste of summer, any time of year!

Conclusion:
Canning your own pizza sauce using this recipe is a fantastic way to ensure you have delicious, homemade flavor ready at a moment’s notice. Not only is it incredibly satisfying to pull a jar of your vibrant, herb-infused sauce from the pantry, but it also offers superior taste and quality compared to most store-bought options. This recipe is great because it’s simple to follow, uses fresh ingredients, and results in a versatile sauce perfect for all your pizza creations. Imagine the joy of topping your homemade pizzas with a sauce you know intimately, made with love and preserved for later enjoyment.
Beyond pizza, this canned pizza sauce is a wonderful addition to pasta dishes, calzones, stromboli, or even as a dipping sauce for breadsticks. Feel free to experiment with variations! Add a pinch of red pepper flakes for a spicy kick, a touch of sugar to balance acidity, or swap out herbs like basil and oregano for thyme or rosemary for a different flavor profile. I truly encourage you to give this pizza sauce canning recipe a try. The effort is minimal, and the rewards are immense – fresh, homemade pizza sauce whenever the craving strikes!
Frequently Asked Questions:
What is the best type of tomato to use for canning pizza sauce?
For the best flavor and texture, paste tomatoes like Roma, San Marzano, or Amish Paste are highly recommended. These varieties have less water content and more solid flesh, resulting in a thicker, richer sauce.
How long will canned pizza sauce last?
When properly canned and stored in a cool, dark place, your homemade pizza sauce should remain of good quality for at least 12 to 18 months. Always check for any signs of spoilage before consuming.
Can I adjust the sweetness or spiciness of the sauce during canning?
Absolutely! You can easily adjust the sweetness by adding a small amount of sugar or honey to taste before jarring. For a spicier sauce, incorporate red pepper flakes or a finely minced fresh chili pepper into the sauce base. Just remember to stick to tested canning guidelines for acidity if you make significant changes.
Pizza Sauce Canning Recipe
A simple and delicious recipe for canning homemade pizza sauce from fresh Roma tomatoes.
Ingredients
-
20 pounds Roma tomatoes
-
1 cup chopped onion
-
8 cloves garlic
-
1/4 cup finely minced fresh basil
-
2 teaspoons salt
-
Citric acid (or bottled lemon juice)
Instructions
-
Step 1
Wash and core the Roma tomatoes. Blanch them in boiling water for 1-2 minutes, then plunge into ice water. Peel the tomatoes and discard skins. -
Step 2
Roughly chop the peeled tomatoes. Cook them in a large pot over medium heat until softened, stirring occasionally. Mash with a potato masher or immersion blender to desired consistency. -
Step 3
Add the chopped onion and minced garlic to the tomato mixture. Cook for 10-15 minutes until onions are translucent and garlic is fragrant. -
Step 4
Stir in the finely minced fresh basil and salt (if using). Bring the sauce to a simmer and cook for 30 minutes, stirring occasionally, to allow flavors to meld and sauce to thicken. -
Step 5
Prepare your canning equipment according to manufacturer instructions. For each pint jar, add 1 teaspoon of citric acid or 1 tablespoon of bottled lemon juice to the bottom of the hot, sterilized jar. -
Step 6
Ladle the hot pizza sauce into the prepared jars, leaving a 1/2-inch headspace. Remove air bubbles with a non-metallic utensil. -
Step 7
Wipe jar rims clean and place hot lids and rings on jars. Tighten rings to fingertip tight. -
Step 8
Process jars in a boiling water bath for 35 minutes for pints. Adjust processing time for altitude as recommended by your canning guide. -
Step 9
Remove jars from canner and let cool undisturbed for 12-24 hours. Check seals before storing.
Important Information
Nutrition Facts (Per Serving)
It is important to consider this information as approximate and not to use it as definitive health advice.
Allergy Information
Please check ingredients for potential allergens and consult a health professional if in doubt.