Easy Homemade Red Enchilada Sauce Authentic Flavor
Easy Homemade Red Enchilada Sauce is a game-changer for anyone who loves Mexican cuisine. Forget those watery, bland store-bought versions! We’re talking about unlocking a depth of flavor that will transform your enchiladas from good to absolutely unforgettable. Who doesn’t adore the comforting, cheesy embrace of a perfectly sauced enchilada? It’s a hug in a dish, a reliable crowd-pleaser, and a weeknight dinner hero. What makes this particular easy homemade red enchilada sauce so special? It’s the perfect balance of smoky chili warmth, a hint of tanginess, and a velvety smooth texture that coats every tortilla beautifully. You’ll be amazed at how simple it is to create this authentic taste right in your own kitchen, elevating everything from chicken to bean enchiladas to an entirely new level.
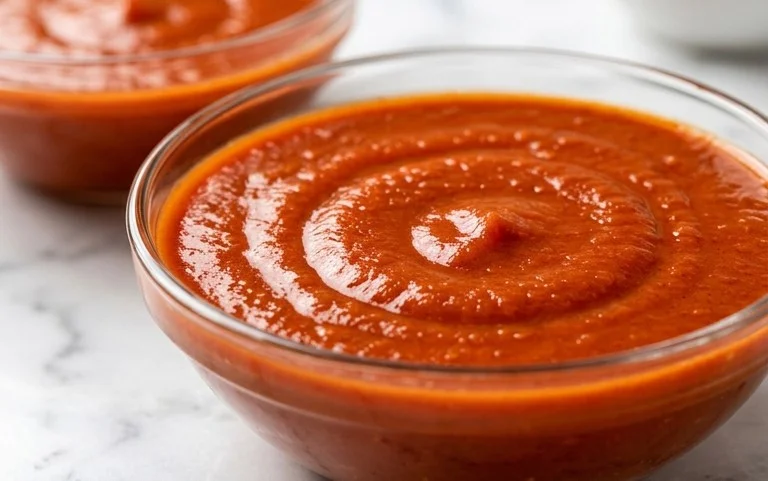
Easy Homemade Red Enchilada Sauce
Tired of store-bought enchilada sauce that tastes like a shadow of its former self? You’re in the right place! Making your own red enchilada sauce from scratch is surprisingly simple and the flavor payoff is enormous. This recipe is designed for busy home cooks who want authentic, vibrant flavor without a fuss. Forget those cans; you’ll be whipping up a rich, complex, and wonderfully spicy sauce that will elevate your enchiladas, and pretty much anything else you decide to drizzle it on, to a whole new level. This sauce has a beautiful balance of smoky chili, earthy cumin, and a hint of warmth from the cinnamon (if you choose to use it). It’s the secret ingredient you’ve been missing.
Ingredients:
- 3 tablespoons all-purpose flour
- 2 tablespoons chili powder
- 1½ teaspoons ground cumin
- ¾ teaspoon garlic powder
- 1 teaspoon dried oregano
- ½ teaspoon Kosher salt
- 2-3 pinches ground cinnamon (optional but recommended)
- 3 tablespoons grapeseed oil (or similar neutral oil like canola or vegetable oil)
- 2 tablespoons tomato paste
- 2 cups low-sodium vegetable broth (or chicken broth, depending on your preference)
- 2-3 teaspoons apple cider vinegar
Cooking Instructions:
This recipe is wonderfully straightforward, and you’ll be amazed at how quickly you can go from pantry staples to a gourmet sauce. The key is building layers of flavor, and we start that process by creating a roux.
Step 1: Building the Flavor Base
First, let’s get our dry ingredients ready. In a small bowl, whisk together the all-purpose flour, chili powder, ground cumin, garlic powder, dried oregano, Kosher salt, and the optional ground cinnamon. If you’re skipping the cinnamon, simply omit it from this mixture. The cinnamon, though a small amount, adds a subtle depth and warmth that complements the chili beautifully without making the sauce taste sweet. Ensure everything is well combined so that the spices are evenly distributed within the flour. This mixture will form the base of our sauce, providing both thickness and that signature enchilada flavor. Set this aside for now.
Step 2: Blooming the Spices and Tomato Paste
Now, grab a medium saucepan or a Dutch oven. Heat the grapeseed oil over medium heat. Grapeseed oil is a great choice because it has a high smoke point and a neutral flavor, allowing the chili and spices to shine. Once the oil is shimmering – be careful not to let it smoke – add the tomato paste. Stir the tomato paste into the hot oil and cook for about 1 to 2 minutes, stirring constantly. This step is crucial! Cooking the tomato paste caramelizes it slightly, deepening its flavor and reducing any raw, metallic taste. You’ll notice the color will deepen to a richer red. This is where the magic starts to happen.
Step 3: Creating the Roux
Next, it’s time to incorporate our dry spice and flour mixture. Gradually add the flour and spice mixture to the saucepan with the bloomed tomato paste and oil. Whisk continuously as you add the mixture. You want to cook this mixture, often called a roux, for about 1 to 2 minutes, stirring constantly. This helps to toast the flour and spices, further developing their flavors and cooking out any raw flour taste. The mixture will become thick and fragrant. This roux is what will give our enchilada sauce its desirable body and smooth texture. Don’t rush this step; a well-cooked roux is foundational for a great sauce.
Step 4: Simmering to Perfection
Once your roux has toasted for a minute or two, it’s time to introduce the liquid. Slowly pour in the low-sodium vegetable broth (or chicken broth), whisking vigorously as you go. This is important to prevent lumps from forming. Continue whisking until the sauce is smooth and the broth is fully incorporated. Bring the mixture to a gentle simmer over medium-low heat. Once it’s simmering, reduce the heat to low, cover the saucepan partially, and let it cook for at least 10 to 15 minutes, stirring occasionally. This simmering time allows the flavors to meld together beautifully and for the sauce to thicken to your desired consistency. If the sauce becomes too thick during simmering, you can always add a splash more broth or water to reach your preferred texture.
Step 5: The Finishing Touches for Brightness
After the sauce has simmered and thickened, it’s time for the final flavor adjustment. Remove the saucepan from the heat. Stir in the apple cider vinegar. The vinegar adds a lovely brightness and a touch of tang that cuts through the richness of the sauce and balances the earthy spices. Start with 2 teaspoons and taste. If you prefer a tangier sauce, add the third teaspoon. Give it a final stir. At this point, you can also taste and adjust for salt if needed, though the low-sodium broth and the initial salt should provide a good starting point. Your vibrant, homemade red enchilada sauce is now ready to be used in your favorite enchilada recipe, or to be stored for future deliciousness.
This sauce is incredibly versatile. It’s perfect for classic chicken or beef enchiladas, but don’t stop there! Try it on baked chicken, as a dipping sauce for quesadillas, or even stirred into rice for a flavorful side dish. For best results, let the sauce cool slightly before using it in your recipes, allowing the flavors to deepen even further. You can store any leftover sauce in an airtight container in the refrigerator for up to a week, or freeze it for longer storage. Enjoy your homemade enchilada creation!

Conclusion:
And there you have it! This easy homemade red enchilada sauce recipe is a game-changer. Forget those store-bought versions that lack depth and freshness. With just a handful of pantry staples and minimal effort, you can whip up a vibrant, flavorful sauce that will elevate your enchiladas to a whole new level. The beauty of this recipe lies in its simplicity and incredible versatility. It’s perfect for beginners and seasoned cooks alike, offering a truly satisfying homemade experience.
I love using this sauce for classic chicken or beef enchiladas, but don’t stop there! It’s also fantastic drizzled over breakfast burritos, as a base for tortilla soup, or even as a dip for chips. Feel free to adjust the spice level to your preference by adding more or less chili powder. If you’re feeling adventurous, consider adding a pinch of cumin for an extra layer of warmth, or a touch of smoked paprika for a delightful smoky undertone. I truly encourage you to give this easy homemade red enchilada sauce a try – I’m confident you’ll be hooked!
Frequently Asked Questions:
Q: How long will this homemade red enchilada sauce last in the refrigerator?
A: Stored in an airtight container, this sauce should stay fresh in the refrigerator for about 5 to 7 days. The flavors actually tend to meld and deepen a bit over time, making leftovers just as delicious!
Q: Can I freeze this enchilada sauce?
A: Absolutely! This recipe freezes beautifully. Once cooled completely, portion the sauce into freezer-safe containers or bags. It can be frozen for up to 3 months. Thaw overnight in the refrigerator and reheat gently on the stovetop.
Q: What kind of chili powder should I use for this recipe?
A: A good quality chili powder is key! For a classic red enchilada sauce flavor, I recommend using a blend of ancho chili powder or a general mild chili powder. Avoid chili powder blends that contain a lot of other spices, as they can alter the authentic taste. Experiment to find your favorite!
Easy Homemade Red Enchilada Sauce
A quick and flavorful homemade red enchilada sauce that’s perfect for your favorite Mexican dishes.
Ingredients
-
3 tablespoons all-purpose flour
-
2 tablespoons chili powder
-
1½ teaspoons ground cumin
-
¾ teaspoon garlic powder
-
1 teaspoon dried oregano
-
½ teaspoon Kosher salt
-
2-3 pinches ground cinnamon
-
3 tablespoons grapeseed oil
-
2 tablespoons tomato paste
-
2 cups low-sodium vegetable broth
-
2-3 teaspoons apple cider vinegar
Instructions
-
Step 1
In a medium bowl, whisk together the flour, chili powder, cumin, garlic powder, oregano, salt, and cinnamon (if using). Set aside. -
Step 2
Heat the grapeseed oil in a medium saucepan over medium heat. Add the tomato paste and cook, stirring constantly, for about 1 minute until it darkens slightly. -
Step 3
Gradually whisk in the dry spice mixture into the saucepan with the tomato paste and oil. Cook, stirring, for another minute until fragrant, creating a roux. -
Step 4
Slowly whisk in the vegetable broth, a little at a time, ensuring no lumps form. Bring the mixture to a simmer. -
Step 5
Reduce heat to low, cover, and simmer for 10-15 minutes, stirring occasionally, until the sauce has thickened to your desired consistency. -
Step 6
Stir in the apple cider vinegar. Taste and adjust seasoning if needed. Use immediately or store in an airtight container in the refrigerator.
Important Information
Nutrition Facts (Per Serving)
It is important to consider this information as approximate and not to use it as definitive health advice.
Allergy Information
Please check ingredients for potential allergens and consult a health professional if in doubt.