Chewy Homemade Granola Bars – Wholesome & Delicious
Chewy Homemade Granola Bars Recipe that will redefine your snack game are finally here! Forget those dry, crumbly store-bought options that often taste more like cardboard than deliciousness. We’ve all been there, reaching for a quick energy boost only to be met with disappointment. But what if I told you that crafting perfectly chewy, satisfying granola bars right in your own kitchen is not only possible, but incredibly simple and rewarding?
Why You’ll Love These Chewy Granola Bars
These aren’t just any granola bars; they’re a delightful symphony of textures and flavors. The secret to their irresistible chewiness lies in a simple combination of ingredients and a mindful approach to baking, ensuring each bite is a perfect balance of wholesome oats, sticky sweetness, and your favorite mix-ins. They’re the ultimate customizable treat, perfect for busy mornings, post-workout fuel, or simply a guilt-free indulgence. Get ready to create your new favorite Chewy Homemade Granola Bars Recipe!
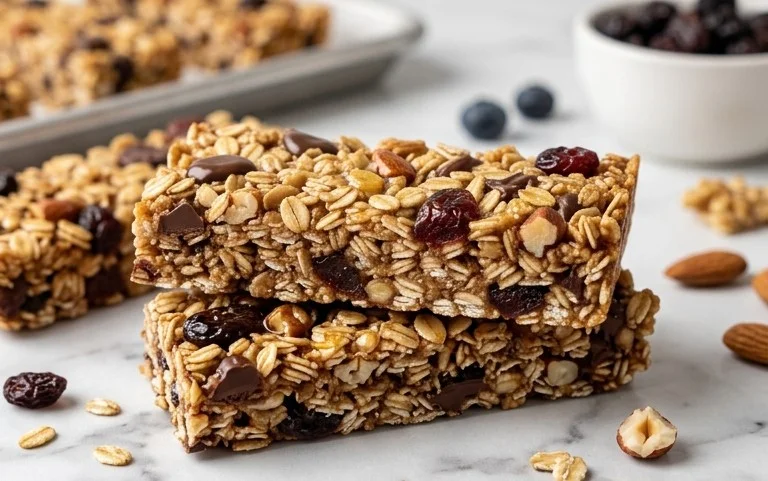
Chewy Homemade Granola Bars Recipe
There’s something incredibly satisfying about making your own granola bars. They’re a fantastic on-the-go snack, perfect for packing in lunches, fueling a hike, or simply enjoying with a cup of coffee. Forget those chalky, overly sweet store-bought varieties! My recipe delivers perfectly chewy, delightfully flavorful bars bursting with wholesome goodness and just the right amount of indulgence. The magic lies in the balance of textures and flavors – the hearty oats, the satisfying crunch of Rice Krispies and graham crackers, the gooey sweetness from honey and brown sugar, and of course, those irresistible pockets of melty chocolate and chewy marshmallows. Making these is surprisingly simple, and the reward is a batch of customizable treats that you can feel good about.
Ingredients:
- 6 tablespoons unsalted butter
- 6 tablespoons brown sugar (, packed)
- 2/3 cup honey
- 3 cups rolled oats
- 1 1/2 cups Rice Krispies cereal
- 1/2 cups graham crackers (, crushed in pieces and crumbs)
- 1/2 teaspoon salt
- 1/2 cup mini chocolate chips
- 1/2 cup cereal marshmallows
Cooking Instructions:
1. Prepare Your Pan and Mix Dry Ingredients: First things first, let’s get our workspace ready. Line an 8×8 inch baking pan with parchment paper, leaving some overhang on the sides. This will make it a breeze to lift the bars out once they’re set. In a large bowl, combine the rolled oats, Rice Krispies cereal, crushed graham crackers, and salt. Give everything a good stir to ensure the salt is evenly distributed throughout the dry ingredients. You want to aim for a mix where the graham cracker pieces are a good size – not completely pulverized into dust, but offering a pleasant bite. Breaking them by hand or pulsing them briefly in a food processor works perfectly.
2. Melt the Wet Ingredients: Now, let’s create that crucial binding agent that will hold all our delicious ingredients together. In a medium saucepan, combine the unsalted butter, packed brown sugar, and honey. Place the saucepan over medium-low heat. Stir constantly as the butter melts and the sugar dissolves. It’s important to be patient here and not rush the process by turning up the heat too high. We’re aiming for a smooth, slightly thickened syrup. Once the mixture is well combined and starts to bubble gently around the edges, remove it from the heat. Be careful not to let it boil vigorously for too long, as this can make the bars too hard.
3. Combine Wet and Dry: Pour the warm, melted butter, brown sugar, and honey mixture over the dry ingredients in the large bowl. Using a sturdy spatula or wooden spoon, stir vigorously until all the dry ingredients are thoroughly coated. This is where the magic starts to happen! Make sure every last oat and piece of cereal is kissed by the sweet, sticky binder. It might seem like a lot of liquid at first, but as you stir, it will evenly distribute. The goal is a clumpy, cohesive mixture that holds together when squeezed.
4. Fold in the Goodies: Once the dry ingredients are well coated, it’s time to add the irresistible extras! Gently fold in the mini chocolate chips and the cereal marshmallows. You want to mix them in just enough to distribute them throughout the granola mixture. Overmixing at this stage can cause the chocolate chips to melt prematurely and the marshmallows to get a bit mushy. We’re looking for distinct pockets of chocolate and marshmallows to create those delightful surprises in every bite. The residual heat from the mixture will help the chocolate chips soften slightly, creating those lovely gooey streaks.
5. Press and Chill: Transfer the granola mixture into your prepared baking pan. This is a crucial step for achieving that perfect density and chewiness. Use the back of your spatula, or even your hands (lightly greased if you find it sticky), to press the mixture down firmly and evenly into the pan. Really pack it in there! The tighter you press, the more cohesive and less crumbly your bars will be. Get into all the corners and make sure the surface is as flat and smooth as possible. Once firmly pressed, cover the pan with plastic wrap or foil and refrigerate for at least 2-3 hours, or until completely firm. This chilling period is essential for the bars to set properly and become sliceable.
6. Slice and Enjoy: Once the granola bars are thoroughly chilled and firm, it’s time for the grand finale. Lift the entire block out of the pan using the parchment paper overhang. Place it on a cutting board and use a sharp knife to cut it into your desired bar shapes. I usually aim for about 12-16 bars, depending on how large I want them. For cleaner cuts, you can warm your knife slightly under hot water and dry it thoroughly before slicing. Store your finished chewy homemade granola bars in an airtight container at room temperature for up to a week, or in the refrigerator for longer. They are delicious enjoyed straight from the fridge for an extra firm bite, or at room temperature for ultimate chewiness. Enjoy your homemade goodness!

Conclusion:
You’ve now got the blueprint to create incredibly delicious and satisfying chewy homemade granola bars! This recipe is a fantastic way to ditch the store-bought versions packed with unwanted ingredients. We’ve focused on a recipe that’s not only simple to follow but yields perfectly chewy, flavorful bars bursting with wholesome goodness. They’re customizable, budget-friendly, and taste so much better than anything you can buy. Imagine the aroma filling your kitchen as you bake these delightful treats – it’s an experience in itself!
These versatile bars are perfect for breakfast on the go, a healthy afternoon snack, or even a pre- or post-workout boost. Feel free to experiment with different add-ins! Think dried fruits like cranberries or chopped apricots, a sprinkle of chocolate chips for a sweet indulgence, or even some toasted coconut flakes for added texture and flavor. The possibilities are truly endless, allowing you to tailor these chewy homemade granola bars to your exact preferences. So go ahead, gather your ingredients, and give this recipe a try. You won’t be disappointed!
Frequently Asked Questions:
How do I get the bars really chewy?
The key to achieving a wonderfully chewy texture lies in the binder. Using honey or maple syrup, along with a bit of nut butter, helps create that satisfying chew. Ensure you don’t overbake the bars, as this can lead to them becoming too hard. A slightly underbaked center is your friend for ultimate chewiness!
Can I make these granola bars gluten-free?
Absolutely! To make these chewy homemade granola bars gluten-free, simply ensure all your ingredients are certified gluten-free. This includes your oats, as well as any other grains or flours you might use. Most binding agents like honey, maple syrup, and nut butters are naturally gluten-free.
How long will these granola bars last?
Stored properly in an airtight container at room temperature, these delicious granola bars should last for about a week. For longer storage, you can keep them in the refrigerator, where they can stay fresh for up to two weeks. You can also freeze them for even longer enjoyment!
Chewy Homemade Granola Bars
Deliciously chewy and customizable homemade granola bars packed with oats, cereal, graham crackers, and sweet additions.
Ingredients
-
6 tablespoons unsalted butter
-
6 tablespoons brown sugar (packed)
-
2/3 cup honey
-
3 cups rolled oats
-
1 1/2 cups Rice Krispies cereal
-
1/2 cup graham crackers (crushed in pieces and crumbs)
-
1/2 teaspoon salt
-
1/2 cup mini chocolate chips
-
1/2 cup cereal marshmallows
Instructions
-
Step 1
Line an 8×8 inch baking pan with parchment paper, leaving an overhang on the sides. Lightly grease the parchment paper. -
Step 2
In a large saucepan, melt the butter over medium heat. Stir in the brown sugar and honey until smooth. Bring to a gentle simmer and cook for 1 minute, stirring constantly. -
Step 3
Remove the saucepan from the heat. Add the rolled oats, Rice Krispies cereal, crushed graham crackers, and salt. Stir until everything is well combined and coated with the honey mixture. -
Step 4
Stir in the mini chocolate chips and cereal marshmallows until evenly distributed. -
Step 5
Pour the mixture into the prepared baking pan. Press down firmly and evenly with a spatula or the bottom of a greased glass. Ensure it’s compact for chewy bars. -
Step 6
Refrigerate for at least 2 hours, or until firm. Lift the slab out of the pan using the parchment paper overhang. Cut into bars.
Important Information
Nutrition Facts (Per Serving)
It is important to consider this information as approximate and not to use it as definitive health advice.
Allergy Information
Please check ingredients for potential allergens and consult a health professional if in doubt.